Why the E-Learning Gaze Block Changes Your Learners’ Attention
For a training manager, instructional designer, or HR officer, the goal isn’t just “how do I make my module more appealing,” but rather “how can I guide attention to improve understanding and retention.” The E-Learning Gaze Block in VTS Editor answers this challenge precisely. By directing the gaze of characters toward the learner, another character, or a point in the environment, you’re staging attention itself. You avoid distraction, enhance the credibility of the scene, and make your instructions “visible” without adding text or voiceover. In other words, gaze becomes a pedagogical tool, not just a stylistic effect. Discover VTS Editor here: Design software for gamified E-Learning modules made easy with AI.
The Role of Non-Verbal Cues Backed by Research
In real life, we decode much of a situation through eye direction, posture, and micro-gestures. Reproducing these signals in an e-learning module, simulation, or serious game alters the way learning happens: the learner perceives relational dynamics, subtle clues, and “where to look first” more effectively. Research shows that visual cues such as eye direction guide attention and speed up information processing (see review on gaze cueing effect). Additionally, reducing cognitive load and signaling the essential improve retention (multimedia theory; signaling principle). Finally, aligning gaze-message-emotion creates a coherent experience that enhances decision-making.
What’s Included
You’ll learn how the block works and how to finely synchronize it with Speak, Emotion, Character Animation, Sound, or Interactions (Click Zones, Scene Interaction). Then, concrete scripting methods to guide visual focus without overwhelming the screen, and three adaptable templates for your learning objectives (briefing, sensitive client interaction, open-space puzzle). The goal: simple, measurable methods, compatible with your constraints (time, LMS/SCORM, multilingual, accessibility).
Configuring the Gaze Block in VTS Editor
What the Block Allows
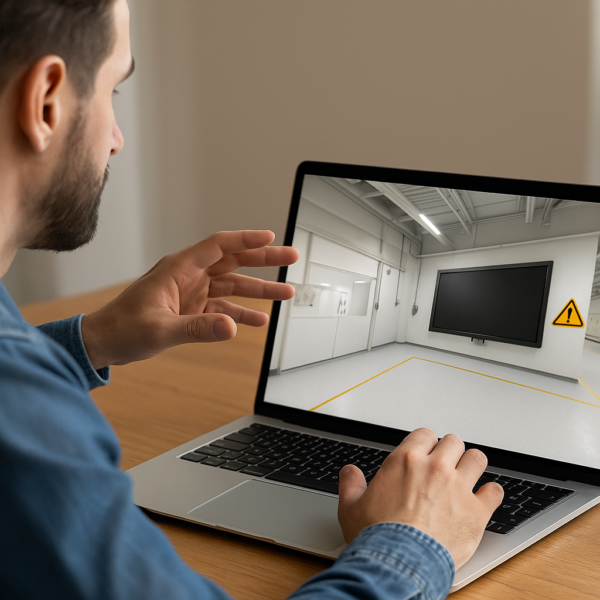
The block sets the gaze “target” for each character in a scene: the learner (the camera), a colleague, or a specific point in the scenery (defined in the scenery configurator). In doing so, you orchestrate a subtle “ballet” conveying intent—to draw attention to a screen, highlight a key phrase, trigger a reflex toward an alarm, or indicate that something is now clickable. To configure your environments and points of interest, explore The Sceneries in VTS Editor.
Simple and Effective Settings
Three settings to configure:
- Gaze behavior: leave it on automatic (by default, about two-thirds toward the speaker, one-third toward the listener) or force gaze straight ahead, at the learner, at a named character, or at a point of interest.
- Delay: offset the action by a few tenths of a second (0.2–0.5 s) to time it right after a line, gesture, or sound.
- Duration: limit how long the gaze stays focused (1.5–3 s for a clue; 5–7 s for an inspection), then return to default behavior. This timing makes the gaze feel natural.
Flow Management
The block has a single output. If no duration is set, the output triggers right after the gaze is activated. If a duration is set, it triggers at the end of the focus. This is handy for maintaining the right sequence: triggering an Emotion once the gaze is perceived, or opening click zones right after the gaze directs the learner’s eye to the correct spot.
Key Synchronizations Around the Gaze Block
In practice, gaze works best when it helps “explain” what the learner is already feeling. A line (Speak), a gesture (Character Animation), an emotion (indecision, joy, anger), or a localized sound create this emotional cue. The gaze then connects these clues together.
Example: a phone rings on the right (Localized Sound); the character’s eyes move toward it (Gaze); an icon appears (Clickable Zone) and the system waits for a click (Wait in Infinite mode). The learner understands without lengthy instruction.
Six High-Impact Use Cases
- Focus on a key object during an explanation: a mentor looks successively at a screen, a KPI board, then a “Quality” folder. The learner keenly follows the chain of priorities, without verbal overload.
- Emphasize a critical line: in the middle of a dialogue, the speaker turns toward the learner as if to ask for agreement or validate an upcoming decision.
- Prepare for interaction: just before displaying a clickable zone, a quick glance toward the target object “marks” the next step and prevents misclicks.
- Signal danger/emergency: a sharp glance at an alarm is enough to trigger an orienting reflex, without interrupting the scene.
- Guide in 360°: combine Gaze with Force 360 (drive the camera) and Freeze 360 (on/off control) to ensure the key element remains in frame.
- Introduce an interface reference: the character glances at the learner then “toward” the progress bar, while a Show Interface block highlights the element.
Design Strategies to Guide the Gaze
Sketch Your “Gaze Line”
Before assembling blocks, sketch out the gaze line of the scene: who looks at what, when, and why. Start neutral (look straight ahead or at the learner); switch to a point of interest for context (screen, object); then redirect to the learner at the decision point. As for timing: 1.5–3 s for a clue; 5–7 s for denser instruction. Short delays (0.2–0.5 s) after a line create a natural, eye-friendly cut.
Winning Trio: Speak, Emotion, Character Animation
Gaze becomes credible when it fits behavioral logic. A confident statement with a joyful expression doesn’t call for the same gaze as a hesitant line with indecision. Define the key line (Speak), add the matching emotion, then the gesture (shoulder shrug, tilt, calming move). Only then does the gaze “communicate” what the character is aiming for or expecting from the learner. If mixing contradictory signals (anger + avoidant gaze), do so intentionally as a teaching tool to help learners spot relational inconsistencies. Discover avatar and expression options here: The characters of VTS Editor.
Prep Action with Clickable Zones and Scene Interaction
Gaze acts as a soft arrow. To prepare an action, lighten the rest: a subtle or directional sound opens the ear; the gaze shifts to the object; the element becomes interactive (slight halo, Scene Interaction triggered); then wait for the click. By limiting visual competition (only one relevant zone at a time), you reduce cognitive load. To create your points of interest, rely on the sceneries and their configurator.
Sound, Media, and 360°: Direct the Eye by Ear and Space
A localized sound prompts the learner’s gaze even before the character’s eyes move. Linking sound and gaze creates a convincing environment. Media (looped mute video, infographics) can act as persistent landmarks: have the character look toward the screen before showing the resource— or the other way around depending on the effect you want. In 360° scenery, drive the camera with Force 360 to bring the point of interest into view at the right moment, then Freeze 360 to keep it from “slipping away” during an instruction.
Accessibility, Legibility, Performance
Not everyone perceives the same cues equally. Double up key moments: gaze + sound, or gaze + short message—especially on mobile. Avoid simultaneous gaze switches for all characters: coordinate one or two; others remain on auto. In your graphs, name points of interest clearly (“Home_Screen”, “KPI_Board”), centralize timing settings (e.g., DELAY_GAZE, DURATION_FOCUS), and encapsulate recurring patterns (Speak + Gaze + Emotion) into Function mode Groups.
Measure the Learning Impact
If your goal is to boost first-time success rate or shorten completion time, measure it. Use Score and Check Score to compare variants (short vs long gaze duration), place Progression checkpoints, and assign a Badge for sequences completed without help. Deployed via SCORM on VTS Perform, these metrics become reliable indicators of the value of non-verbal micro-signals.
Three Ready-to-Use Templates for VTS Editor
Mission Briefing: Progressive Focus Without Overload
Begin with a simple Text Animation and a short setup (Message or Slideshow with three visuals). A slight launch sound sets the mood. Have the mentor speak to frame the context, then direct their gaze to the Main Screen for two seconds. Display a learning resource (Scene Media) on that screen: an infographic or a mute video loop. Smooth transition: the mentor comments, then looks at the KPI Board. Display a tooltip using Message to explain an indicator, with a small sound. Finally, gaze moves to a key object on the desk, open a Clickable Zone and wait for action. In 360°, use Force 360 between points of interest to ensure nothing is missed.
Difficult Client: Non-Verbal Signals and Guided Decision
Start with a complaint from the client (Speak), showing Anger, and direct their gaze to the learner for two seconds. The colleague steps in, neutral Emotion, looking at the client then the learner to hand off, with a calming gesture. Display response choices (Choice of Phrases) adjusting a Communication score. If the learner chooses empathy, the client’s anger shifts to sadness and the gaze returns to the learner; if defensive, the anger remains and the gaze wanders; if asking an open question, indecision appears as the client alternates glance. At the end, the client and colleague could “validate” via a knowing look, while you display adapted feedback.
Open-Space Puzzle: Multimodal Clues and Timing
Start with a phone ringing to the right (Localized Sound). The character turns their eyes toward it: the learner follows. Trigger a Scene Interaction on the PC screen and launch a visible Countdown (30–45 s) to add tension without penalty. Gradually reveal Clickable Zones with clues (post-it, badge, drawer), limiting visibility to what’s relevant at the moment. Once the learner clicks on the screen, display a clue email (Scene Media). Deliver a short instruction (Message) and verify via Keypad. If time runs out, a mentor steps in and you reset cleanly with a Checkpoint. If successful, reward with a Badge, update Progression, and open a debrief resource.
Take Action with the E-Learning Gaze Block
With the right settings, the E-Learning Gaze Block becomes an attention accelerator and comprehension enhancer. It replaces lines of instructions, reduces misclicks, and smooths decisions. For a training or HR manager, it’s a simple way to boost module impact without bloating production. For an instructional designer, it’s a reusable visual grammar, multilingual and LMS-compliant. You can get started quickly with a free 30-day trial: Try Virtual Training Suite, or compare plans: VTS Editor subscriptions.
Quick Implementation Checklist
- Select the key point of interest (character, object, screen) and the “signal-giver.”
- Set the Delay (0.2–0.5 s) and Duration (1.5–3 s for simple focus; 5–7 s for thorough inspection).
- Synchronize with Speak/Emotion/Animation and, if helpful, with Localized Sound or Scene Media.
- Test on desktop and mobile; in 360°, combine Force 360/Freeze 360 to keep the key point in view.
- Measure: completion time, errors, decisions; fine-tune timing and sequence; capitalize via “Function” Groups.
Quality Memo: avoid excessive gaze switching without reason, align gaze with emotion (unless used pedagogically), and double up critical signals with a secondary cue (sound or message). Standardize your “gaze patterns” into reusable functions and activate them based on learner level (Flags/Variables). For more on interactive formats, explore our Gamified E-Learning Modules.
Useful References:


