Harness the E-Learning Slideshow Block in VTS Editor to Boost Engagement
Looking to grab attention, craft a clear message, and produce quickly without sacrificing quality? In VTS Editor, the e-learning Slideshow block addresses all three challenges. In just a few minutes, you can align full-screen images, add a subtitle, choose a background, define a pace and a voiceover (delivered by a character), and offer a smooth, legible visual story—whether on desktop or mobile. It’s a perfect narrative starter to set the context, explain a process, launch an activity, or summarize the key takeaways.
What You’ll Learn
- Turn a slideshow into a learning accelerator (intro, procedure, recap).
- Configure every option correctly and apply design and accessibility standards.
- Connect your slideshow with other blocks (Menu, Sequence, Sound, Media in Scenery, Foreground, Variables, Language Condition).
- Streamline your production (functions, variable media) and track results via LMS (SCORM) or VTS Perform.
Who This Is For
- Instructional designers and digital learning managers looking to script fast and well without coding.
- Training and HR managers aiming to standardize intros, processes, and recaps with a graphic identity and tracking data.
- Serious game creators wanting to punctuate the narrative between two interactive scenarios.
Key Features of the E-Learning Slideshow block in VTS Editor
Slide, Image, and Subtitle Management
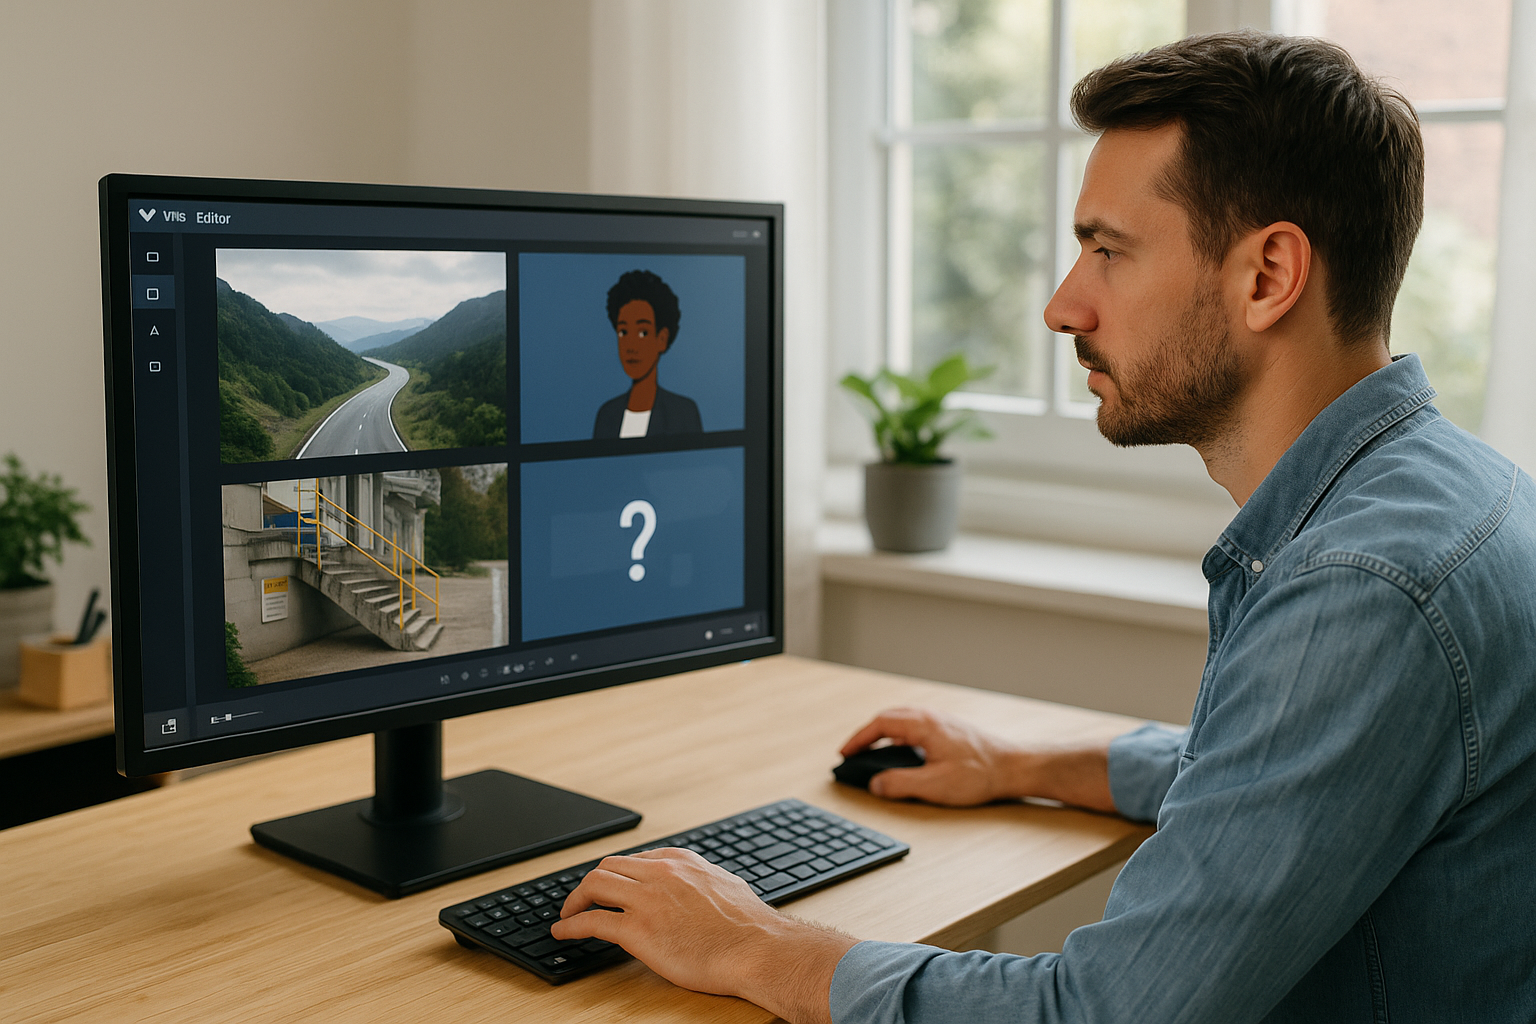
Each slideshow displays in full screen, one slide at a time. For each, import an image (16:9 ratio recommended, 1280 × 720 px for clarity and light weight), enter a subtitle, adjust its position (top, center, bottom), and set a background color—useful when the image doesn’t cover the entire screen or has transparency. Visual consistency (palette, illustration style, margins) enhances both comprehension and your visual identity.
Playback Modes and Navigation
Three playback modes are available: Manual (learner advances with arrows), Automatic (uniform duration per slide), and Custom (individual duration per slide, useful for timing voiceover). In Automatic/Custom, arrows remain active for free navigation unless you split content into multiple slideshow blocks to prevent backward navigation at key moments (e.g., before an assessment).
Voice, Accessibility, and Block Exit
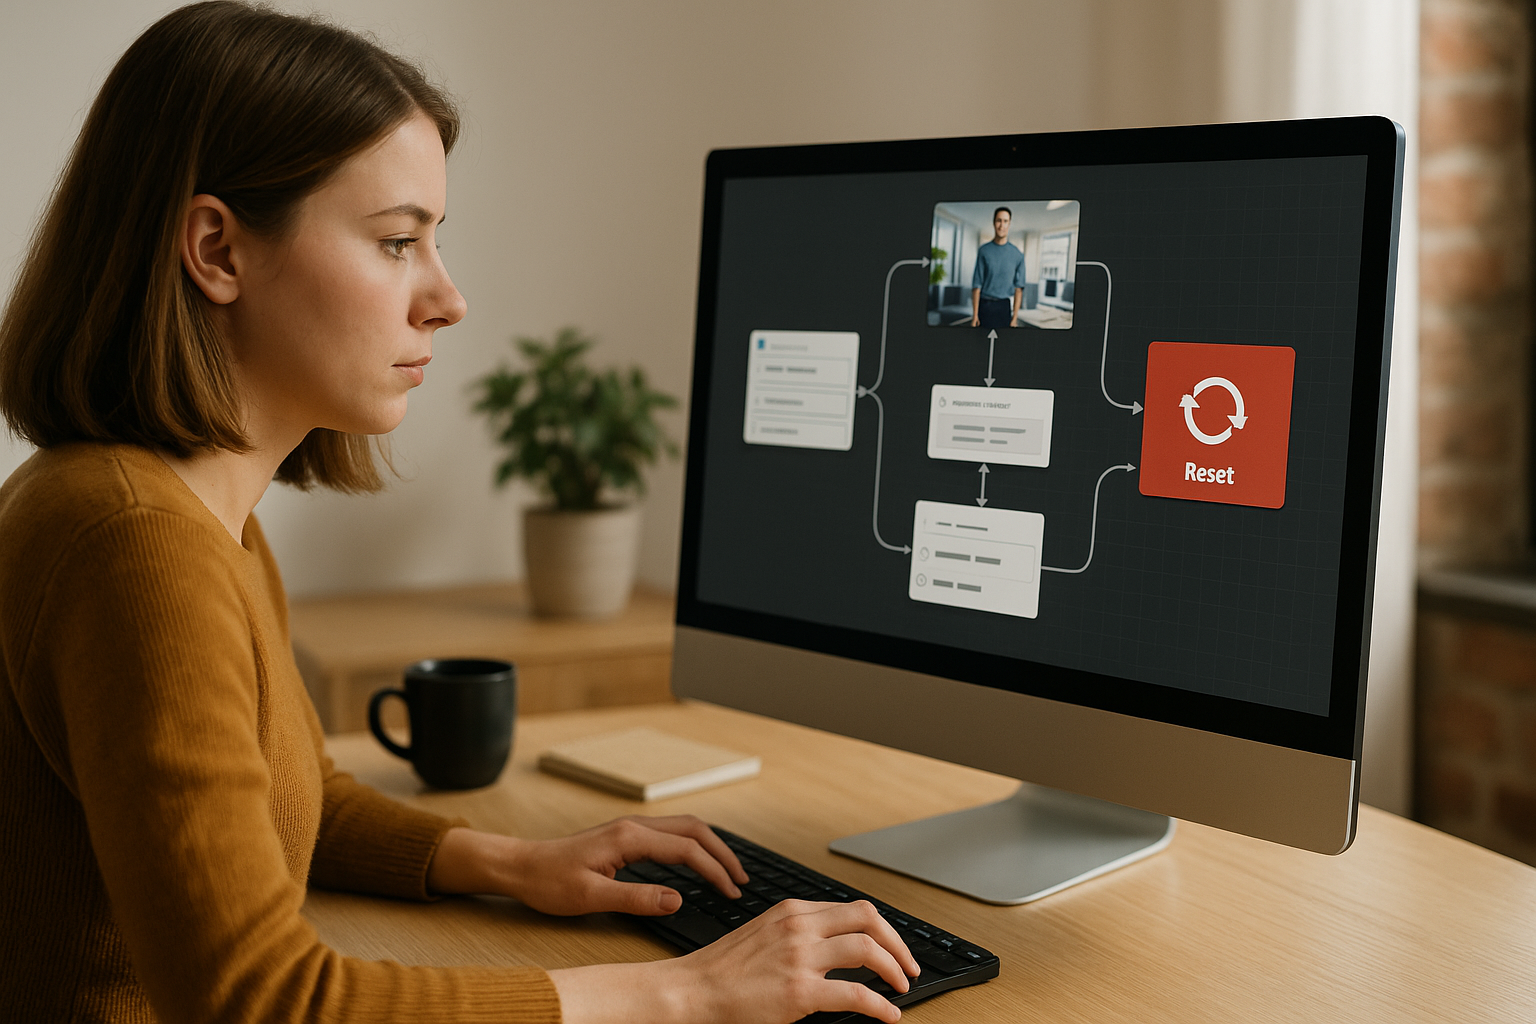
Having a character vocalize subtitles adds a clear and accessible audio layer. Technically, block exit is unique: it triggers at the end of the slideshow (or last slide reached in manual mode). This simplifies the graph and avoids complex paths.
High-Impact Use Cases for the E-Learning Slideshow
For compliance, start with a short visual story that provides regulatory context, illustrates a typical incident, and states learning objectives. For onboarding, 6–7 slides can explain the value proposition, org chart, and key contacts. For safety, detail a step-by-step protocol using pictograms, field photos, and concise subtitles. Post-activity, a “recap” slideshow helps anchor learning: three “Key takeaways” slides, one “Pitfalls to avoid,” and one “What’s next?” slide. In serious games, a “teaser” slideshow can introduce the rules and evaluation criteria before the hands-on scenario begins.
Why E-Learning Slideshows Enhance Memory Retention
Multimodality and Cognitive Load
The image + text + voice combination supports dual coding and limits unnecessary cognitive load if the content is well-segmented: one idea per slide, visible keywords, simple transitions. See: Sweller, Cognitive Load Theory and Multimedia Learning principles (Mayer). For verbal/visual encoding, also check the Dual-Coding Theory (University of Geneva).
Pacing and Learner Control
Manual mode gives back control to the learner, boosting self-efficacy. Automatic mode sets the rhythm of your storytelling for a “broadcast” message. Using a character-driven voice adds immersion (manager, expert, client) and humanizes the message.
When to Choose Another Format
Use Video for uninterrupted demos or filmed testimonials; Message for short instructions requiring validation; Foreground to highlight a key visual (diagram, screenshot) instantly over the scene.
Setting Up an Effective E-Learning Slideshow: Guide, Design, and Accessibility
Prepare Your Media
- Images: 1280 × 720 px (16:9) for a good quality-to-weight ratio.
- Compression: JPEG for photos, PNG for graphic elements.
- Consistency: color palette, style, margins, reusable title/subtitle templates.
Slide Duration and Navigation Settings
- Manual: learner-controlled for documentation, standards, or diagrams.
- Automatic: short pitch that sets the tone.
- Custom: varying density or syncing with voiceover.
Duration guidelines: 5–8s for a short visual message; 10–15s for a process step; 15–20s for dense narration. Test, time, adjust. To prevent going back (e.g., before a quiz), split into multiple successive slideshows.
Audio and Voiceover
Enable voiceover and select a character that fits the context (e.g., manager for internal announcement, quality expert for a procedure). In Custom mode, make sure the display length matches the spoken phrase to avoid abrupt cutoffs. If background ambiance is playing via the Sound block, slightly reduce volume during narration and use fades for clean transitions.
Legible Design and Hierarchy
- High contrast text/background (light on dark or vice versa).
- Semi-transparent backgrounds for busy images.
- Text position: top (announcement), center (storytelling), bottom (caption).
- One idea per slide, 3–7 keywords, no dense paragraphs.
Accessibility and Mobile Display
- Sans-serif fonts, large size, spaced line height, ample margins.
- Voice + text option for noisy settings or hearing-impaired users.
- Test on desktop/tablet/mobile for contrast, subtitle length, and template consistency.
Quality Checklist for Your E-Learning Slideshow
- One core idea per slide, mobile legible.
- Adequate contrast; use background fill if needed.
- Durations matched to content density and/or audio.
- Clear navigation (free or softly locked).
- Narration tested with proper fades and levels.
- Consistent visuals (templates, margins, style).
Scripting and Measuring: Advanced Combinations with Other Blocks
Learning Path Orchestration
Menu offers multiple entry points (“Context,” “Steps,” “Best Practices”), each linking to a dedicated slideshow. Sequence chains several slideshows together (Intro → Steps → Recap) with output triggered at the end of each. Random varies the order of training cases to increase replayability.
Embed in Immersive Scenes
Media in Scenery displays your slides on a meeting screen, factory board, or welcome monitor within the scenery. This integrates your message into the environment: characters can turn toward the screen, react, and comment. Foreground overlays an image/video on the foreground for instant focus (safety alert, critical screenshot). Sound adds ambiance (office, factory, nature) with mastered volumes and fades. Gaze directs characters toward the point of interest to guide attention.
Advanced Personalization and Multilingual Support
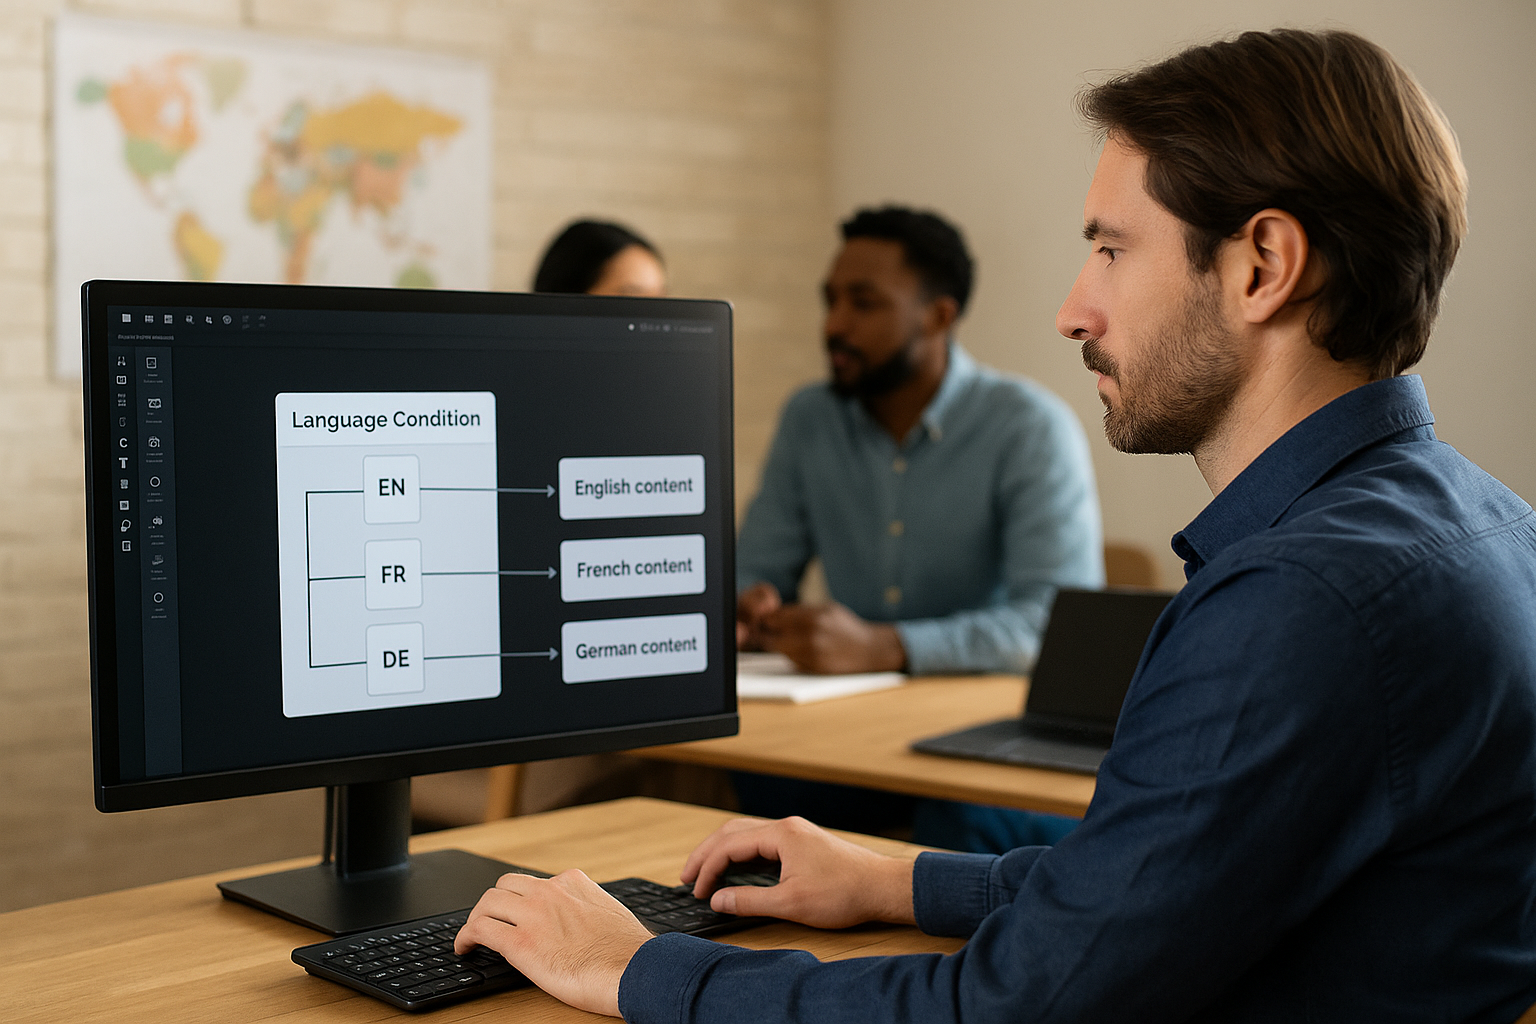
Variables: adapt subtitles, durations, or visuals based on profile (beginner/expert, job role, industry). Variable media link a variable (e.g., mediaSlide_1) to the most relevant image without duplicating blocks. Language Condition automatically redirects to the EN/FR/DE version of the same slideshow while preserving its structure.
Gamification, Tracking, and Proof of Learning
After a key slideshow, Progression can increase progress (e.g., +10%) and mark completion. Add a Quiz or True/False to validate knowledge; a Badge can reward full viewing of a safety brief. For deployment, SCORM export feeds your LMS (completion, duration, score). Using VTS Perform, get deeper analytics: time spent, revisited slides, drop-off points. Iterate quickly: shorten a slide, split one, insert a Foreground for a key message, or trigger a Message block where needed.
Reuse and Scale Without Graph Overload
Function Call: turn a standard slideshow (project intro, process recap, safety warning) into a reusable function. Update once, apply everywhere. Combine with Sequence to organize steps in recurring paths. Variable media reduces duplication: a single “shell” slideshow adapts in real time to the industry, country, or team. To A/B test two designs, use a Random block to direct users to either version.
Real-World Examples for L&D Decision-Makers
- International onboarding: Language Condition upfront, localized “Vision & Values” slideshow, then Menu by department. Track via SCORM; adjust durations if VTS Perform analytics show slower reading in some countries.
- Workshop safety: “Golden Rules” Custom slideshow with “Team Leader” voice, factory ambiance using Sound, Foreground for each critical pictogram. Follow with a Quiz; assign a “Safety Ready” Badge.
- CRM Change Management: “Why Are We Changing?” slideshow (short storytelling), then “Onboarding Steps,” followed by clickable zones on screenshots. Progression tracking and feedback via LMS.
Take Action with the E-Learning Slideshow
Create a ready-to-use template: slide templates, styles, default durations, and story rules. Integrate it in a typical flow (Intro slideshow → Activity → Recap slideshow). Test on mobile, adjust contrasts, margins, and pacing. Plug in Progression, export to SCORM or publish with VTS Perform, and iterate using data. Launch a 5–7-slide pilot today: enable voiceover, add subtle ambient sound, and if needed, contextualize with Media in Scenery. Measure engagement, collect feedback, optimize durations… then duplicate.
To go further:
- Discover the authoring tool: VTS Editor
- See real-world results: Client Cases
- Upskill efficiently: Training & Support
- Request a personalized demo: Request a demonstration
Reminder: Best Practices for Your E-Learning Slideshow Block
- Deliver key takeaways at a glance; segment if needed.
- Ensure comfortable reading (contrast, size, pace).
- Test on multiple devices; refine based on feedback.
- Leverage synergies with other blocks and tracking tools.